Well, I was finally able to get the Air-Venturi gas ram installed in my Gamo Whisper over the weekend. (Here’s a link to the part:
http://www.pyramydair.com/s/a/Air_Venturi_Ram_Air_Gas_Spring_Conversion_Fits_Many_Gamo_Rifles/2103) I had planned to do this over a week ago, but a damaged piston seal (from the factory no less) forced me to wait until a replacement showed up from JM (which was very hard). To sum it up, I am VERY happy with the Air-Venturi gas ram!!!
While waiting, I did a thorough de-burring to the receiver and honed the compression chamber. In hind sight, I think I would skip the honing step in the future (it seems a little too rough to me even though I used 400 grit stones) unless the bore looks rough to the naked eye. My receiver was pretty darn smooth from the factory and I did hesitate to do the hone, but the experts here suggested I go ahead with it so I did. I’m not certain what this has really gained me (and hopefully it hasn’t hurt anything), but I think next time I have the rifle apart I’ll smooth it out further with some 800 grit paper wrapped around the hone.
Anyway, here we go! This mod was performed on a Gamo Whisper, and should work on many other Gamo rifles with the same powerplant (Big Cat, Viper, Hunter 440, etc.), and possibly some of the Chinese copies (hint, hint…). I won’t get into real detail on the tear-down, as there are plenty of those already. Start by removing the action from the stock and then removing the spring, trigger block, and the rest of the internals from the receiver. You only need to remove the piston sleeve if you are replacing the seal or plan to clean/tune the rifle, otherwise it can just stay in the rifle.. BE CAREFUL HERE!!! The mainspring is under considerable force and may be pre-compressed several inches. Use a spring compressor if you can (I used a large, heavy-duty bar clamp since I knew the mainspring in my Gamo was only pre-compressed an inch at most). The only parts from inside the receiver that you re-use are the piston and the rear pin block (which in my case was integral with the rear spring guide). You can toss (or keep if you prefer) the old spring, the tophat, and anything else in there.
The one part that needs to be modified for the Air-Venturi installation is the rear spring guide/pin block. Here is what it looks like when taken out of the rifle:
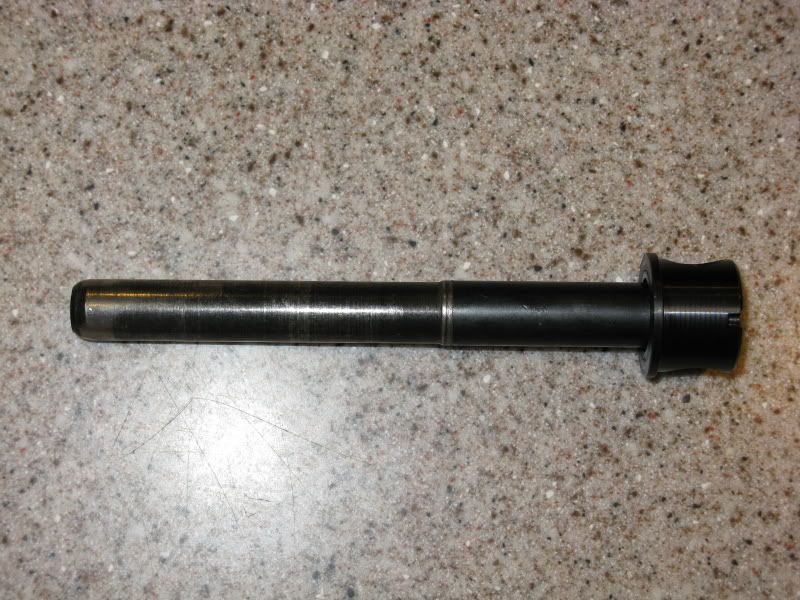
This needs to be cut down to almost a nub in order for it to fit together with the other parts. I cut it off with a large cutting wheel, then slowly and carefully ground it the rest of the way down to 0.050â€. This fits against the rear Delrin part of the Air-Venturi, and the face it rests against is just a tiny bit under 0.070â€.
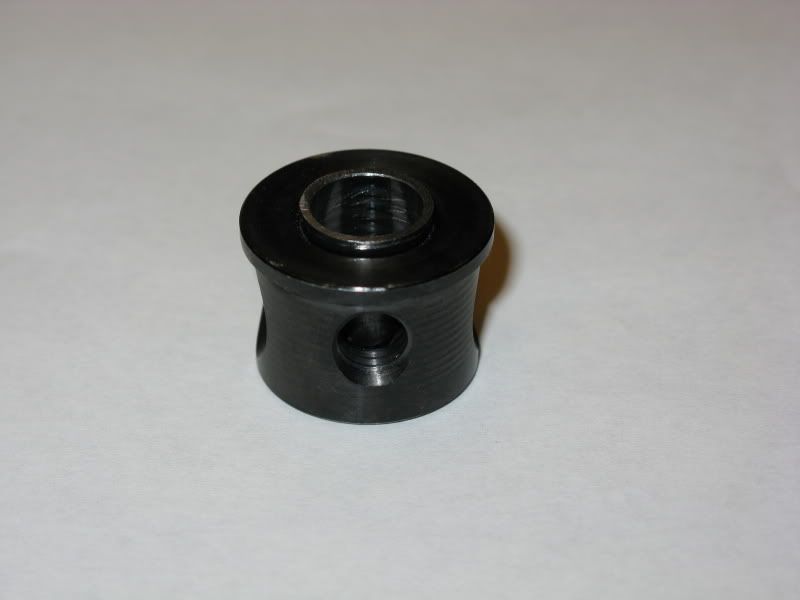
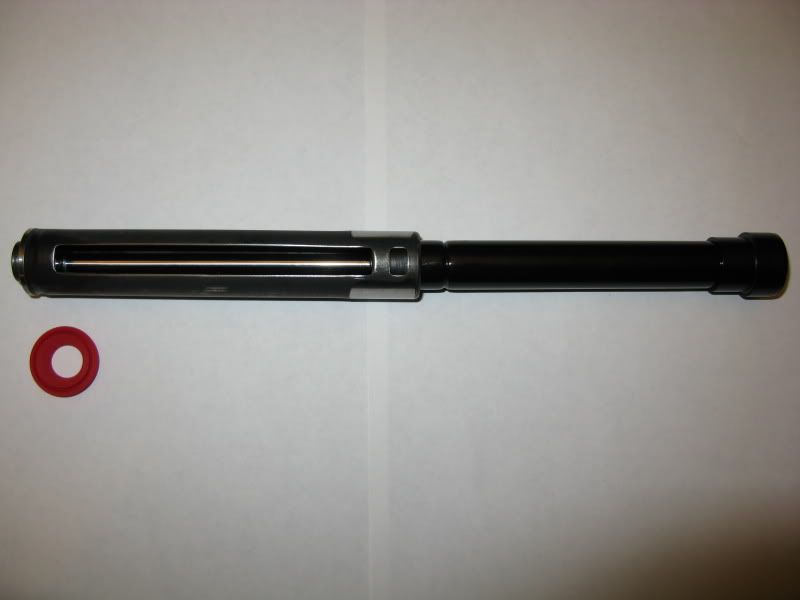
As you can see in the photo below, the top part of the piston is a good solid chunk of stainless steel about 1/2 inch thick. This part rotates freely inside of the piston sleeve, which is something I did not know prior to taking my rifle apart. The ram rod on the Air-Venturi gas ram makes direct contact with the rear of this part inside of the piston sleeve.
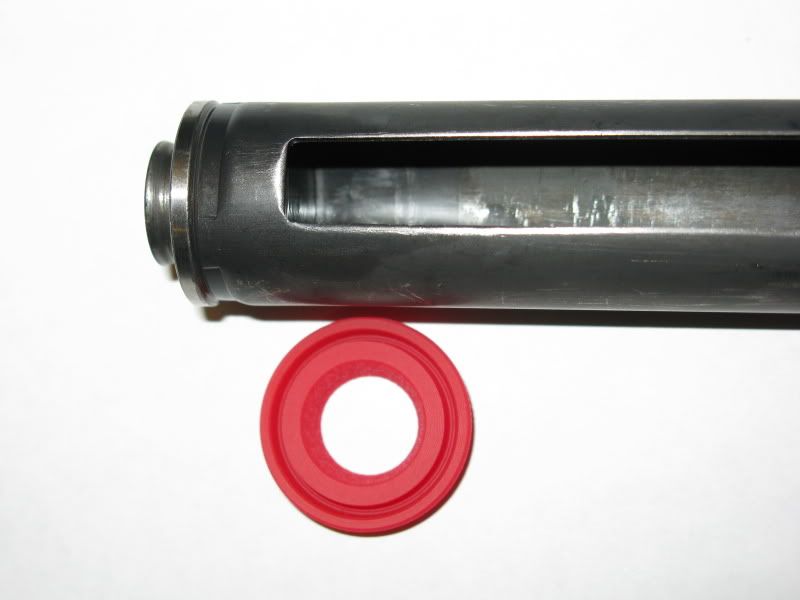
The rear portion of the piston sleeve has been expanded slightly on a mandrel by Gamo, and then machined to a pretty smooth surface. Other than the piston seal, this machined face is the only other moving part that makes contact with the inside of the receiver after the Air-Venturi modification and is the part that requires lubrication. Lube on any other external portion of the piston sleeve except the seal does no good after the AV mod.
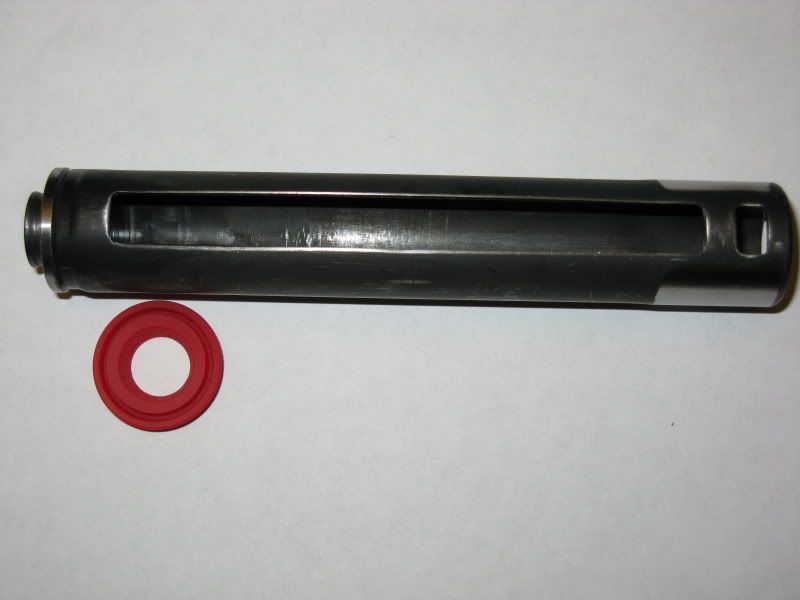
Here you can see exactly how the Air-Venturi fits together with the piston. The rear spring guide/pin block fits against the right hand side of all of this. I still need to put the piston seal on in case you didn’t notice. :p This whole assembly slides into the receiver and is then held in place by the rear pin block. That’s it!
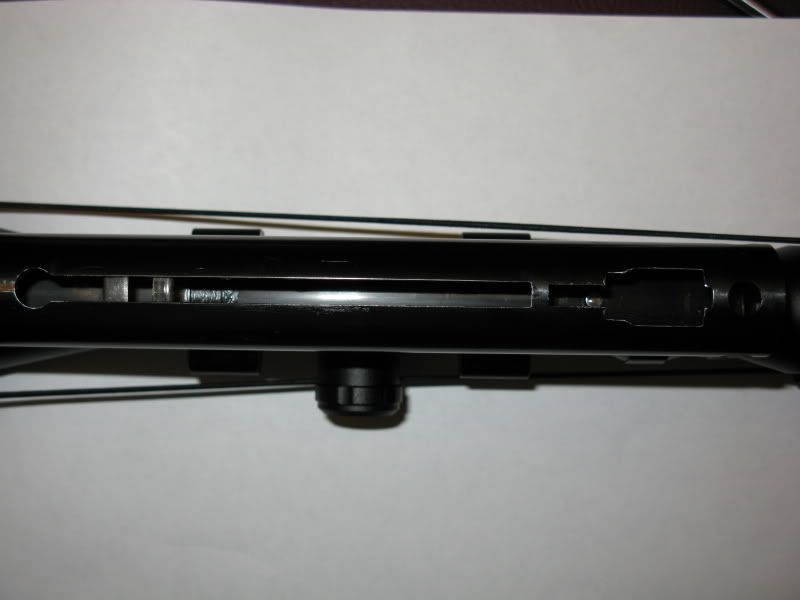
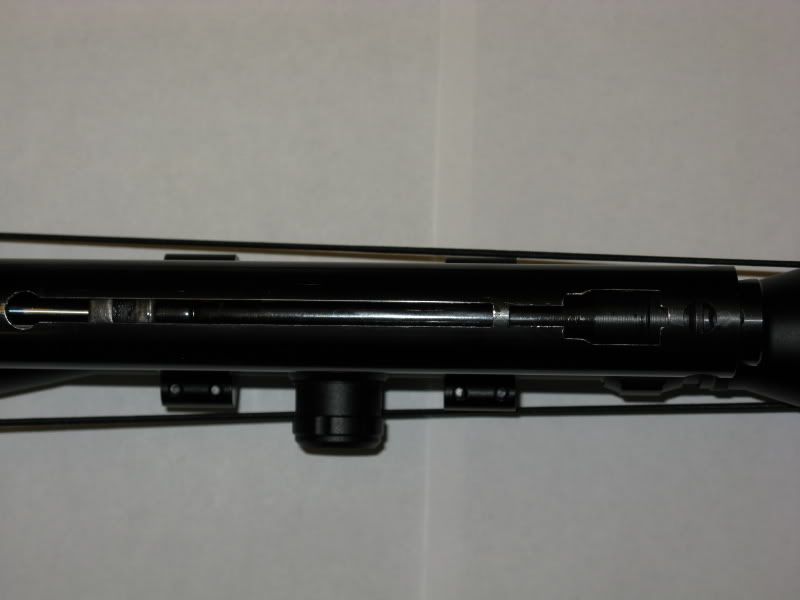
First we have a shot of the piston installed in the rifle. I installed the piston seal onto the piston and lubed it up with some 100% pure silicone oil. I also put a VERY thin coat of this on the walls of the compression chamber. I put about a 1/2 teaspoon onto a napkin and wiped the walls down using a dowel. A very light, thin coat is all that is necessary. I recommend stopping by you local R/C hobby store and picking up some 100% pure Silicone shock oil used in R/C car shocks. It comes in various weights (I like 30 weight for general purpose) usually in a 2-3 fluid ounce bottle for a few dollars. Great stuff for multiple purposes around the house. Anyway, looking at the next picture you can see the little bit of Moly paste from James Maccari at the rear of the piston (I bought the package deal which I recommend
http://www.airguns.citymax.com/catalog/item/251484/4169286.htm). You don’t need to use very much of the Moly paste!
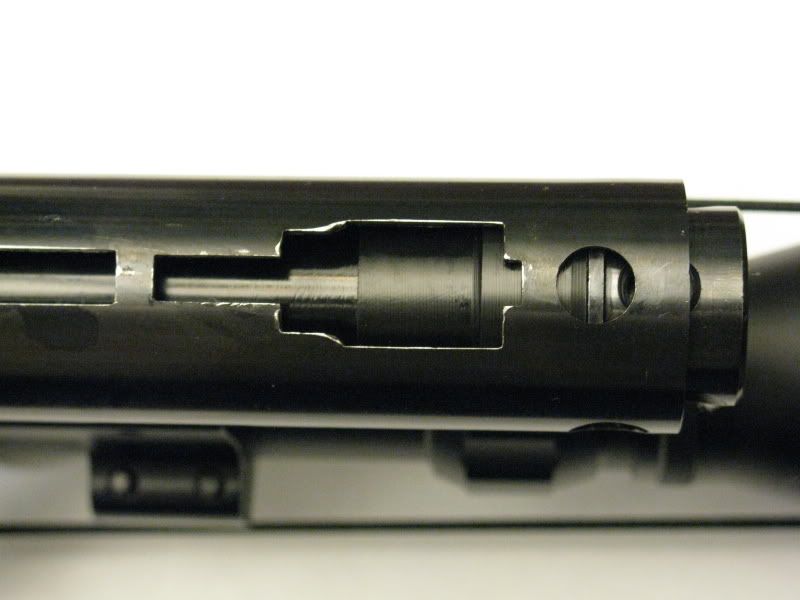
Here is a close-up, for what it is worth…
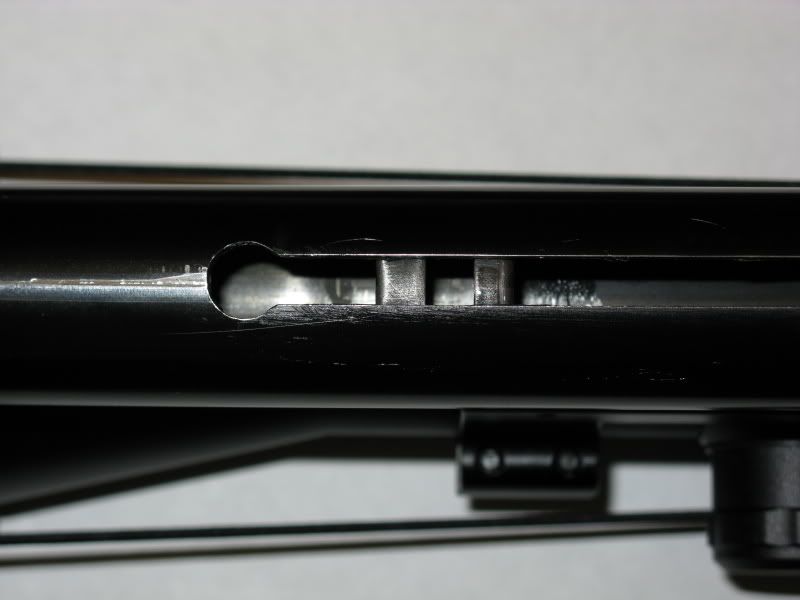
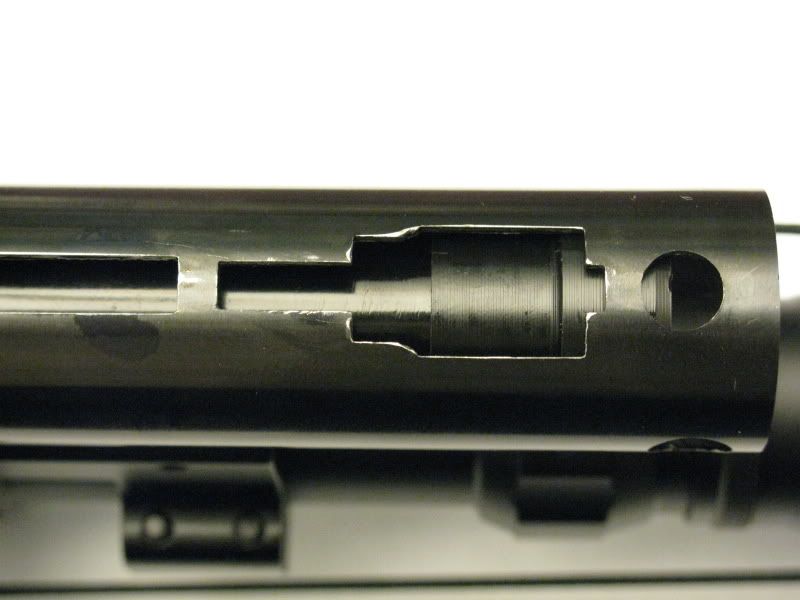
Next, place a small amount of Moly paste on the end of the gas ram rod (since this will be a metal-to-metal contact point under large amounts of force) or lightly coat the rear face of the piston. Also lightly coat the forward Delrin part on the gas cylinder. This part slides inside the piston sleeve so it requires lube. Next, carefully slide the gas ram into the receiver until the Delrin part at the front of the gas ram’s cylinder section makes contact with the piston sleeve. You might then have to jiggle the receiver a little bit to get the cylinder over the step of the piston sleeve. Once the gas ram rod is butted against the rear of the piston, it should look like this:

As you might already be able to tell, there won’t be much pre-compression to deal with in this set-up. A nice side benefit.

Here’s a close-up:
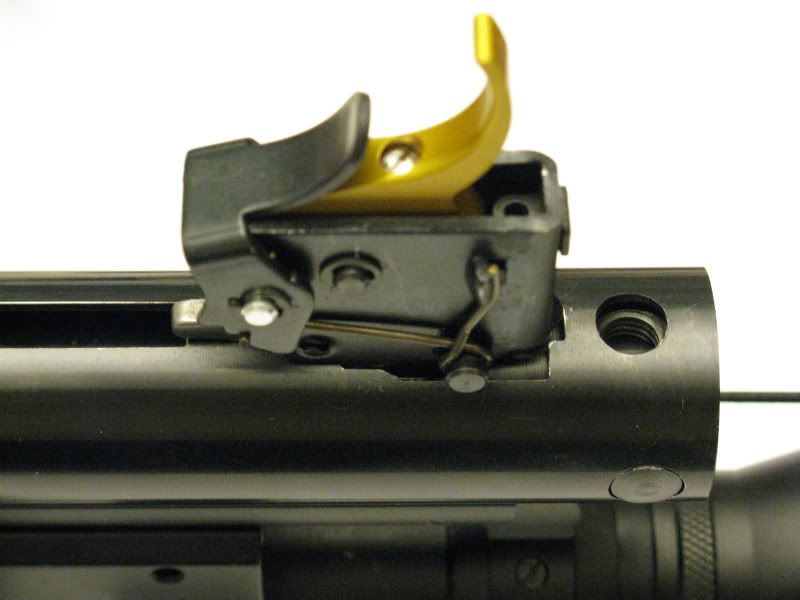
Here you see the modified rear pin block in place with all the parts ready to be compressed and locked into place:
And again, a close-up:
Make sure you install the trigger block now, prior to compressing all the parts into place, as the rear Delrin piece will prevent the trigger block from being installed once it is in its final position.
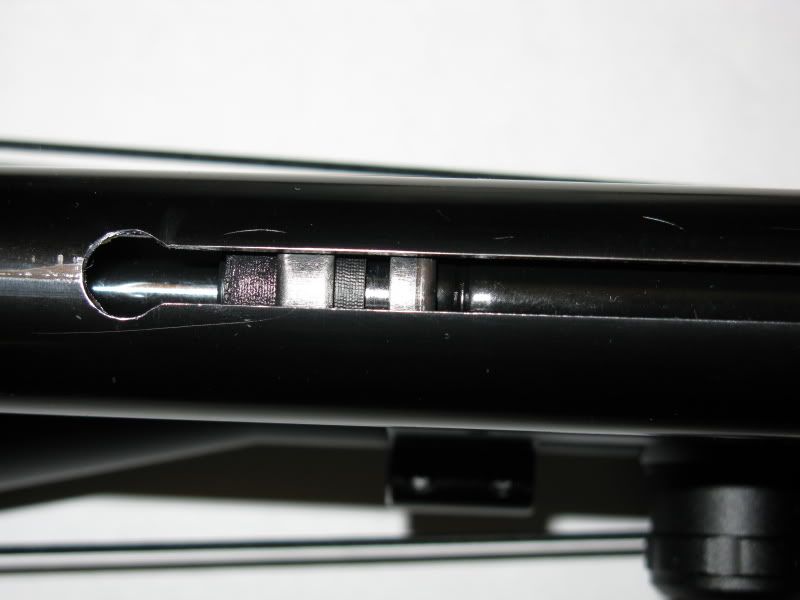
Here is a close-up of the rear of the piston sleeve after all the parts are compressed into the gun and the pin is dropped into place. Note where the forward Delrin piece now sits. I measured the cocking stroke on my rifle and it is just a hair under 4†at 3 and 15/16â€.
Next, put the action back into the stock (being sure to use Blue Lock-Tite) and let it sit for a day or so…
Since I know you couldn’t resist the urge to immediately shoot the rifle, be sure to double-check the stock screws before letting the Lock-Tite set up after shooting it a bit.
So there you have it. Pretty easy mod really! If you can do a tune, you should surely be able to install the Air-Venturi gas ram. The hardest part is cutting down the rear spring guide.
I am VERY PLEASED with the results from my Air-Venturi gas ram. After the initial settle-in period (took about 100 or so shots), my velocities are up between 5% and 8% over what the factory spring was doing just prior to removal. I chrono’d 60 shots (10 shots each with 6 different pellets) before and after the mod to confirm this. I won’t recount the exact numbers here, but I’m now spitting out Beeman Crow Magnums at a little over 850 fps, Crosman Premier Hollow Points at about 905 fps, and JSB Exacts at about 870 fps. Not too shabby!
The biggest change in the rifle is how it shoots. Hold sensitivity has been GREATLY reduced!!! Twang is a thing of the past!!! When you pull the trigger all you get is a nice, resolute THUMP. I don’t notice any rebound like before, though there might be just a tiny bit; hard to tell. Accuracy has gotten a lot better due to the gas ram, and my rifle now has a much higher tolerance of different pellets. Prior to the mod, it hated the CPHP pellet, and now I can get 3/8†groups (edge-to-edge) from them at 10 yards. I can literally stack the JSB exacts at 10 yards now!!!
The rifle also sounds a lot quieter now. I’m not sure if it really is though from a dB perspective; the sound it makes when pulling the trigger is much lower pitched than it was before, so it just might sound quieter to the human ear. It is definitely harder to cock than it used to be, and the force required to cock it starts as soon as you break the barrel. I would estimate the required cocking force to be somewhere in the mid forty pound range. I still need to check this on the bathroom scale.
Anyway, I hope this helps at least one person out. I searched ALL OVER for this information prior to my Air-Venturi modification to no avail. Take care, and SAFE SHOOTING!!!